 how-to
Tips for Organizing Camping Gear: A Practical Guide
Table of Contents
- Sort Your Gear by Activity and Season
- Create a Camping Gear Checklist for Beginners
- Invest in Storage Bins and Vertical Solutions
- How to Pack a Camping Bin for Easy Access
- Organize Camping Kitchen Gear by Function
- Label Everything and Maintain an Inventory Log
- Maintain and Clean Gear Before Storage
- Adapt Organization for Apartments and Small Spaces
Last Updated: August 22, 2026
Sort Your Gear by Activity and Season
Organizing camping gear starts with recognizing that different activities and seasons demand different equipment. Sorting by activity and season prevents overpacking, reduces confusion at the campsite, and ensures you grab exactly what you need.
Identify your primary camping activities: car camping, backpacking, fishing, or winter expeditions. Each demands different gear. Car camping requires a larger tent and camp stove; backpacking demands lightweight alternatives. Seasonal sorting is equally critical, summer and winter camping require different sleeping bags, tents, clothing layers, and cooking equipment.
Many outdoor enthusiasts maintain separate "summer bins" and "winter bins" for easy access. At GreatAdventureSupply, we recommend creating a simple matrix: list your activities down the left side and seasons across the top, then mark which gear belongs to each combination. This visual reference guides packing and storage decisions while revealing gaps in your collection.
Create a Camping Gear Checklist for Beginners
A camping gear checklist transforms abstract organization into concrete action. Without one, you'll inevitably forget something important or overpack unnecessarily.
Essential categories to track
Build your checklist around these core categories:
- Shelter and sleep system: tent, sleeping bag, sleeping pad, ground tarp
- Cooking and food: camp stove, cookware, utensils, plates, cups, food storage containers
- Clothing and personal gear: layers, jacket, hat, socks, toiletries, medications
- Safety and repair: first aid kit, multi-tool, repair tape, flashlight, batteries
- Navigation and communication: map, compass, headlamp, whistle
- Furniture and comfort: camping chairs, table, rope, stakes, guylines
Use specific items rather than vague entries. Instead of "cooking gear," list "2-quart pot," "8-inch skillet," and "cooking utensils." Color-coding by category adds another organizational layer and helps you scan quickly before departure.
Using your checklist for rotation
After each trip, mark which items performed well and which caused problems. This feedback loop improves your packing decisions over time. Many experienced campers maintain two versions: a full checklist for extended trips and a minimal checklist for weekends.
Review and update your checklist seasonally. Winter camping requires different clothing quantities than summer camping. Your checklist should reflect these adjustments.
| Category | Essential Items | Seasonal Adjustment |
|---|---|---|
| Shelter | Tent, sleeping bag, pad | Winter: insulated pad; Summer: lighter bag |
| Cooking | Stove, cookware, utensils | Winter: extra fuel; Summer: cooler |
| Clothing | Layers, jacket, socks | Winter: more insulation; Summer: sun protection |
| Safety | First aid, flashlight, tool | Year-round: consistent core items |
Invest in Storage Bins and Vertical Solutions
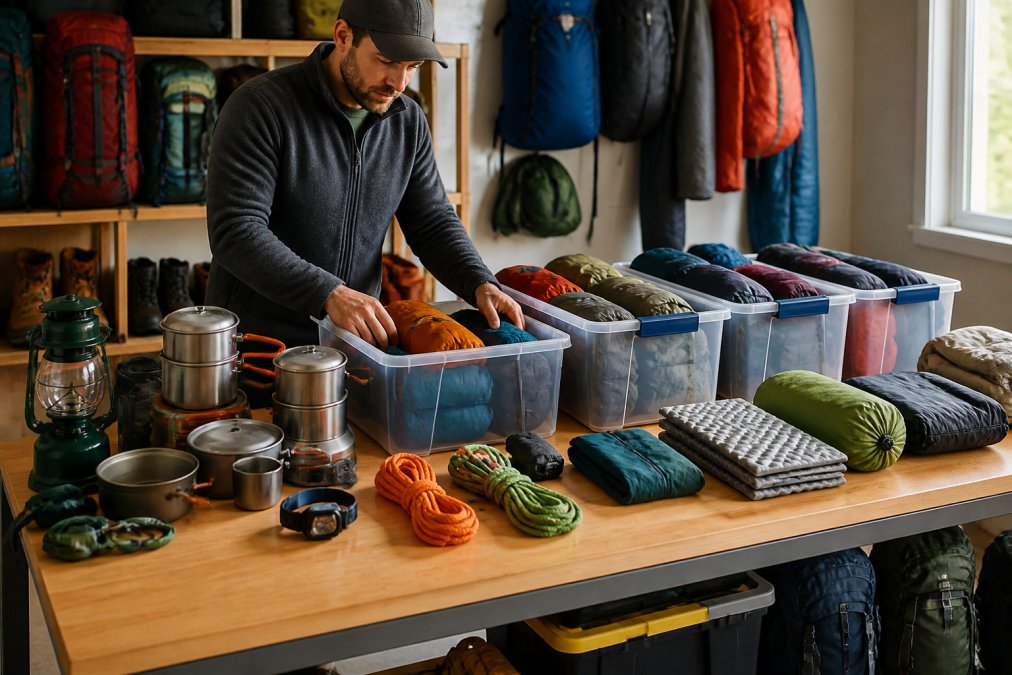
The right containers transform disorganized piles into an efficient system. Storage bins and vertical solutions provide the physical infrastructure that makes organizing camping gear sustainable.
Choosing the right container types
For camping gear, choose rigid plastic bins with tight-sealing lids. They protect equipment from moisture, pests, and physical damage while remaining accessible and stackable.
Select graduated sizes: small bins for accessories like carabiners and tent stakes, medium bins for sleeping bags and clothing, and large bins for bulky items like tents. This prevents digging through enormous containers to find single items.
Clear plastic bins let you see contents without opening each one, saving time when packing. Label them anyway for quick confirmation. Waterproof fabric bins work well for sleeping bags and clothing that need breathability, though they offer less pest protection than rigid plastic.
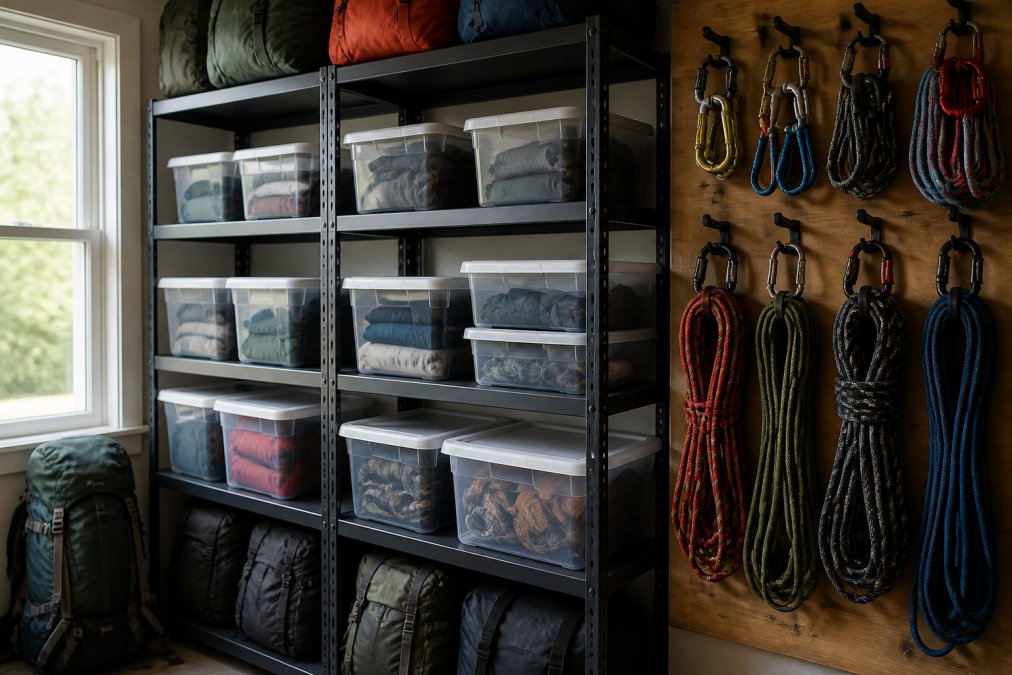
Wall mounting and shelving for small spaces
Wall-mounted shelving, pegboards, and hooks transform unused wall space into functional storage. Heavy-duty metal shelving rated for at least 300 pounds per shelf supports filled bins effectively (the CDC).
Pegboards mounted above a workbench create flexible storage for frequently accessed items like carabiners, rope, tent stakes, and repair tools. Unlike fixed shelving, pegboards reconfigure easily as needs change.
Heavy-duty hooks hold coiled rope, hammocks, and backpacks. Lighter hooks manage cords and carabiners. A mixed approach combining shelving, pegboards, and hooks maximizes space efficiency while keeping frequently used equipment within arm's reach.
How to Pack a Camping Bin for Easy Access
Strategic packing determines whether you can access what you need or spend time searching. The goal is creating a system where items are findable, protected, and efficiently packed.
Nesting and modular packing strategies
Nesting places smaller items inside larger ones: stuff socks inside shoes, place smaller bags inside larger bags, and nest cookware together. This maximizes space while creating natural groupings that make unpacking intuitive.
Modular packing creates self-contained units within your bin. Place all breakfast items in one stuff sack, lunch items in another, and dinner items in a third. At camp, you grab the breakfast sack and you're ready to cook.
Use packing cubes for clothing: one for base layers, another for insulation layers, and a third for outer layers. For delicate items like camp stoves, double-wrap in a stuff sack and waterproof bag.
Weight distribution and load organization
If transporting gear in a vehicle, place heavier items low and toward the center. Lighter items go on top or toward edges. Within a bin, heavy items settle at the bottom, lighter items on top.
For backpacking, pack heavier items mid-pack closer to your back, medium-weight items toward the top, and lighter items on outer edges. This distribution keeps your center of gravity stable while hiking.
Organize Camping Kitchen Gear by Function
Your camping kitchen is a system, not a random collection. Organizing it by function, cooking, eating, food storage, creates efficiency at the campsite.
Separating cookware, utensils, and consumables
Dedicate separate containers to each kitchen function. Cookware (pots, pans, griddles) goes in one bin. Utensils (spatulas, tongs, knives) go in another. Eating utensils and dishes occupy a third container. Food storage containers, coolers, and food-specific items form a fourth group.
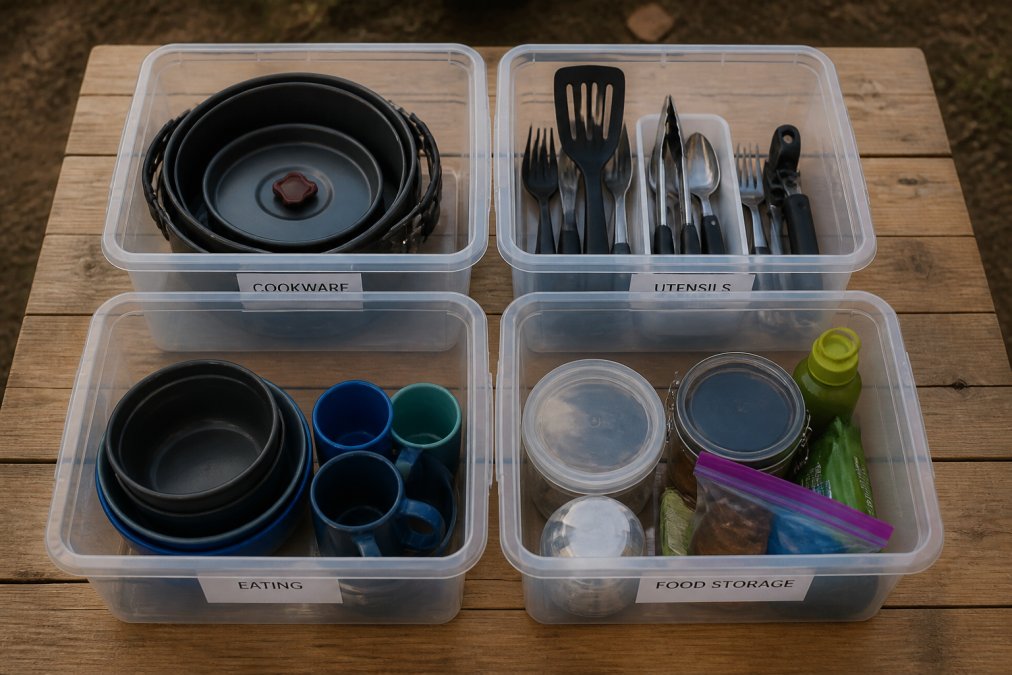
Moisture control and food storage safety
Ensure everything is completely dry before storing. After your trip, wash all items, dry them thoroughly, and let them air-dry for several hours before packing.
Use desiccants inside kitchen gear bins to prevent humidity accumulation. Never store food or food-stained containers without thorough cleaning, food residue attracts pests and creates hygiene issues. Store coolers with lids open to prevent sealed moisture from accumulating.
Label Everything and Maintain an Inventory Log
Labeling is where many organizing systems fail. Without clear labels, carefully organized bins become mysteries within weeks. Maintenance logging ensures your system stays current.
Digital tracking systems for gear management
Digital inventory systems offer advantages over paper checklists. Create a spreadsheet with columns for item name, quantity, bin location, condition, and purchase date. Mobile apps designed for inventory management offer additional features like barcode scanning and photo documentation.
Update your digital inventory after each trip, noting any damage, lost items, or gear needing maintenance.
Maintenance logs and repair notes
A maintenance log tracks condition and care history. For each significant piece of gear, note purchase date, maintenance performed, date of last use, any damage observed, and repairs needed. This prevents discovering broken equipment at the campsite and helps determine whether to repair or replace gear.
Maintain and Clean Gear Before Storage
The condition of your gear when you store it determines its condition when you retrieve it.
Waterproofing and pest prevention steps
Inspect tents and tarps for damage after each trip. If waterproof coating is wearing thin, reapply seam sealer before storage. Air sleeping bags completely in sunlight, which kills bacteria and removes odors (peer-reviewed research). Store sleeping bags loosely, never compressed in stuff sacks for months.
Never store camping gear with food residue or stains. Insects and rodents are attracted to food particles. Store gear in sealed containers in cool, dry locations. Avoid damp spaces like unheated sheds.
Seasonal preparation and gear longevity
Before off-season storage, perform thorough inspection. Check zippers, seams, and fabric for damage. Lubricate zippers with zipper lubricant or graphite powder (the FDA). Light oil on metal components prevents rust. Coil rope properly and store in cool, dry places away from direct sunlight.
Your gear investment, whether from GreatAdventureSupply or elsewhere, lasts longer with consistent maintenance.
Adapt Organization for Apartments and Small Spaces
Apartment dwellers need creative solutions that don't consume living areas. The vertical approach becomes essential, wall-mounted shelving, pegboards, and hooks replace floor-based storage.
Under-bed storage offers hidden capacity. Flat bins slide easily under beds and keep gear out of sight. Closet organization systems designed for clothing adapt well to camping gear. Hanging organizers hold small items; hanging rods accommodate backpacks and sleeping bags.
Vacuum-seal bags compress bulky items to a fraction of their normal size, though they're better for temporary than long-term storage. Consider shared storage solutions if your building offers climate-controlled units.
A well-organized small space outperforms a disorganized large space. Your camping gear occupies less actual space than you might think when organized efficiently.
Organizing camping gear properly transforms your outdoor experience from chaotic to confident. When you know exactly where equipment is, what condition it's in, and how to pack it efficiently, you spend less time preparing and more time enjoying your adventure. GreatAdventureSupply offers the durable, reliable gear that makes these organizational systems worthwhile. Start with a clear sorting system, invest in appropriate containers, and maintain a simple tracking method. Your next camping trip begins the moment you organize your last one.
Frequently Asked Questions
What is the best way to organize camping gear in a small apartment?
Use vertical storage with wall-mounted shelves, hooks, and pegboards to maximize floor space. Store sleeping bags and soft goods in vacuum-sealed bags under beds. Use clear storage bins that stack efficiently in closets, and label everything for quick identification. Digital inventory tracking helps you know exactly what you have without taking up physical space.
How do I create an effective camping gear checklist for beginners?
Start by categorizing gear into shelter, sleep system, cooking, clothing, and safety items. List each piece with quantity, condition notes, and last maintenance date. Include sleeping bags, pads, tents, cookware, utensils, and first-aid supplies. Review your checklist before each trip and update it based on what you actually used. Digital checklists let you check items off and track gear rotation across multiple trips.
What's the best way to pack a camping bin for vehicle transport?
Use nesting and modular packing: place larger items like sleeping bags in stuff sacks at the bottom, then add medium containers with cookware and clothing. Stack lighter items on top to maintain balance. Keep frequently accessed gear like first-aid and tools toward the front or top. Distribute weight evenly across the bin to prevent shifting during travel, and use packing cubes to organize soft goods and prevent wrinkling.
How do I keep camping gear in good condition during storage?
Clean and dry all gear thoroughly before storing it. Use desiccant packs in storage bins to control moisture and prevent mold. Store sleeping bags loosely in breathable bags, not compressed. Keep a maintenance log noting any repairs, replacements, or damage. Check stored gear seasonally for pest activity or deterioration. Waterproof tents and gear before long-term storage, and store metal items in dry conditions to prevent rust.
This article was written using GrandRanker