 how-to
How to Patch a Tent Rainfly: Step-by-Step Guide
Table of Contents
- Assessing the Tear or Damage to Your Rainfly
- Choosing a Repair Method: Temporary vs. Permanent
- Field Repair for a Tent Rainfly: Quick Fixes on the Trail
- How to Repair a Tent Tear: The Permanent Patching Process
- Using Tent Repair Tape for Quick Adhesive Patches
- How to Re-Waterproof a Tent Rainfly After Repair
- Repairing Seams and Seam-Tape Failure
- Testing Your Repair and Long-Term Care
- Frequently Asked Questions
Last Updated: October 10, 2026
Assessing the Tear or Damage to Your Rainfly
The first step in learning how to patch a tent rainfly is understanding what you're dealing with. A small pinhole requires a different approach than a multi-inch rip along a seam.
Examine the damage closely: size, location, and shape matter. Small holes under half an inch are straightforward to patch. Larger tears or damage along seams, corners, or pole attachment areas need more attention.
Clean the area with a dry cloth to remove dirt and debris, which helps you assess the damage and ensures your repair will hold.
Most modern rainflies use polyester with PU coating. Check your tent's documentation to confirm the material, as different fabrics respond differently to adhesives and repair tape.
Choosing a Repair Method: Temporary vs. Permanent
Two main repair paths exist: quick field fixes and lasting permanent repairs. Temporary repairs using repair tape get you through the rest of your trip and can hold for several more camping trips. Permanent repairs involve cleaning, proper adhesive application, and curing time, choose this approach when you're home with time to let adhesive cure properly.
Field Repair for a Tent Rainfly: Quick Fixes on the Trail
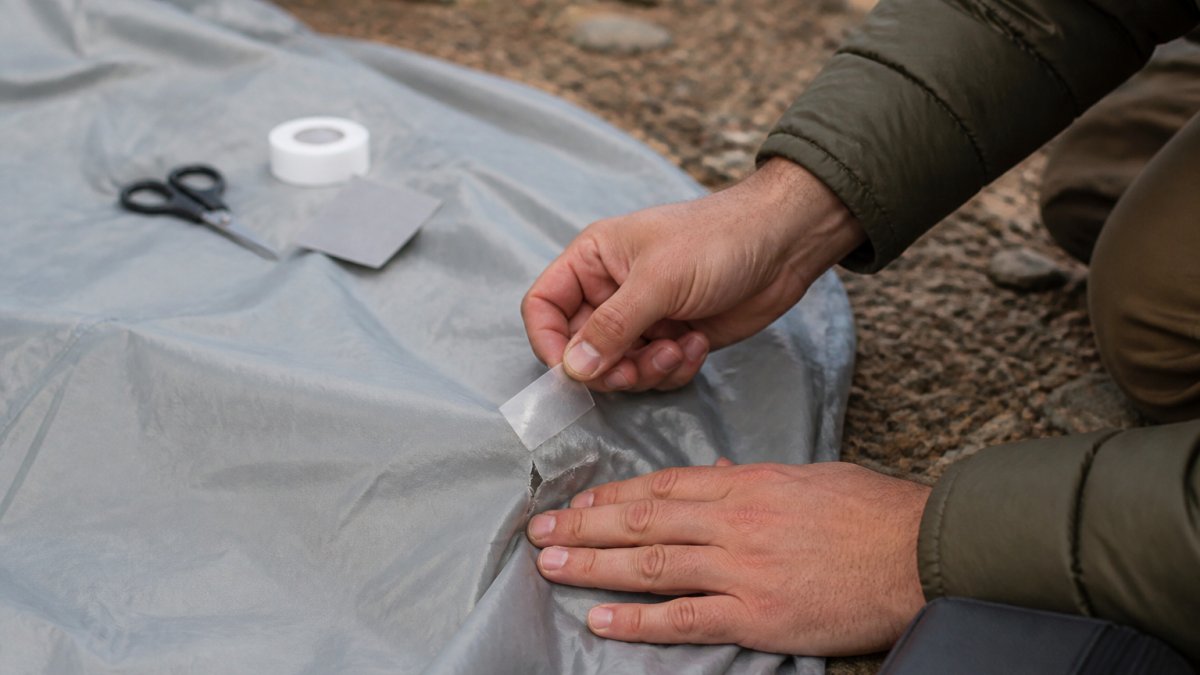
Repair tape is your fastest option. Tenacious tape and similar products stick to wet or damp fabric without drying time. Clean the area, cut a patch slightly larger than the damage, round the corners, and press firmly for 30 seconds. For very small holes, medical tape or duct tape works in a pinch; apply to both sides if possible.
Keep a repair kit in your pack: a few patches of repair tape, a small cloth, and rubbing alcohol in a waterproof pouch. Press tape from the center outward to remove air bubbles. Field repairs typically last one to three trips before needing replacement.
How to Repair a Tent Tear: The Permanent Patching Process
Permanent repairs require more time but deliver results that last years. This is the approach to use when you're home with proper conditions.
Cleaning and Preparing the Fabric
Start by thoroughly cleaning the repair area. Dirt and oils prevent adhesive from bonding properly.
Dampen a clean rag with rubbing alcohol and wipe the area around the tear, working outward in a circular motion to remove dust, pollen, and coating residue. Let the area dry completely (typically 10-15 minutes); moisture under adhesive creates weak bonds.
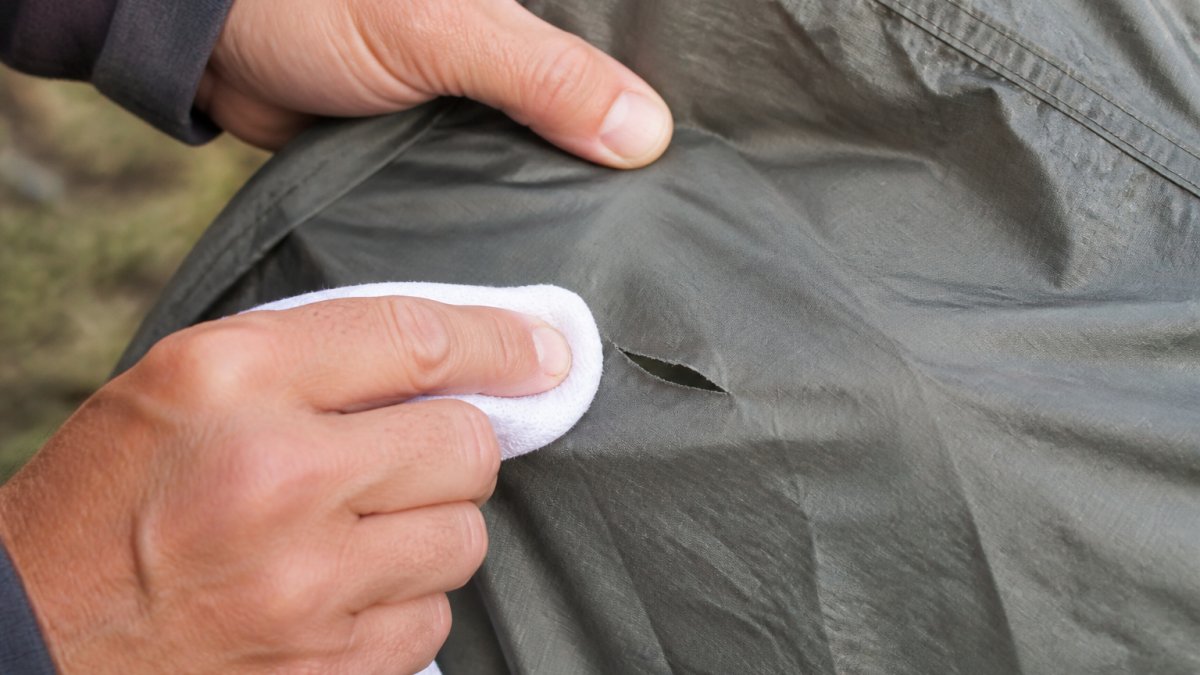
For seams or areas with seam tape, gently lift peeling edges with a soft tool like a plastic card and clean underneath. Inspect the cleaned area, it should be dry, free of debris, and ready for patching.
Selecting and Sizing Your Patch
Make your patch at least one inch larger than the damage on all sides. Round or oval patches work better than square ones; rounded corners prevent edges from catching and peeling during use.
Cut your patch from fabric patches or compatible tent fabric (fabric patches work best for permanent repairs). Test fit before applying adhesive to confirm complete coverage.
Rounding Patch Corners and Applying Adhesive
Round corners generously (aim for a quarter-inch radius) to prevent peeling. Test the rounded patch on the damage area before applying adhesive.
Apply fabric adhesive to both the patch and fabric surface using a small brush. Press the patch firmly from the center outward to remove air bubbles, holding for 30-60 seconds. Wipe away excess adhesive and let cure per product instructions (typically 24 hours) before using the tent.
Using Tent Repair Tape for Quick Adhesive Patches
Repair tape like Tenacious tape works on wet or damp fabric without additional glue. Clean the area, cut your patch with rounded corners, remove the backing, and press firmly. Apply to both sides when possible for a stronger seal. It typically holds for multiple camping trips.
How to Re-Waterproof a Tent Rainfly After Repair
A patch stops the immediate leak, but it disrupts the rainfly's waterproof coating. Restoring that barrier is essential for long-term durability.
Identifying Your Rainfly's Coating Type
Most modern rainflies use polyurethane (PU) or silicone (Si) coating. Polyurethane is the industry standard and feels slightly tacky. Silicone is lighter and smoother but requires silicone-compatible seam sealer. If unsure, contact the tent manufacturer, using incompatible products is the leading cause of repair failure.
Restoring the Waterproof Layer
Once your patch has cured (typically 24 hours), seal the boundary between the patch and original fabric. For polyurethane-coated rainflies: Apply seam sealer (like Seam Grip or Aquaseal) in a thin, even bead around the patch perimeter. For larger patches (over 2 inches), apply to both inside and outside. For silicone-coated rainflies: Use silicone-based seam sealer, which cures more slowly (typically 48 hours).
Spray-On Waterproofing for Full Coverage
For maximum protection, apply waterproof spray coating (like Nikwax) in light, even coats from 6-8 inches away. One or two light coats are better than one heavy coat. Allow each coat to dry (typically 2-4 hours) and let the coating cure fully (24-48 hours) before rain exposure.
Testing the Waterproof Seal
Before your next trip, verify that the repair and waterproof layer are effective.
Set up your tent in a safe location (yard, garage, or covered area). Use a spray bottle or garden hose to apply water to the patched area. Start with a gentle mist and gradually increase water pressure.
Watch the interior of the tent carefully. Look for water droplets, dampness, or any sign of seepage around the patch edges or at the seam-sealer line.
Pop-up Camping Tent for 2-3 People with Carry Bag and Rainfly for Backpacking →
If water enters, allow everything to dry completely and reassess. Common causes of failure include:
- Incomplete seam sealer coverage: Gaps in the sealer line allow water to wick under the patch.
- Insufficient curing time: Using the tent before seam sealer fully cures compromises the bond.
- Coating incompatibility: Using PU sealer on silicone fabric or vice versa.
- Air bubbles under the patch: These create channels for water infiltration.
If the repair fails the water test, clean away the seam sealer with rubbing alcohol, allow the area to dry, and reapply sealer more carefully. Most second attempts succeed.
Once the repair passes the water test, your tent is ready for use. A properly sealed patch with compatible waterproofing can last for years of regular camping.
Repairing Seams and Seam-Tape Failure
Seam failures require different diagnosis and repair approaches than fabric tears. Understanding the type of seam damage determines whether a simple re-seal, patch, or professional repair is appropriate.
Identifying the Type of Seam Damage
Seams fail in two ways: seam-tape peeling (adhesive bond deteriorates, tape lifts away) and stitching failure (thread is broken or missing). Inspect carefully: gently lift the seam tape with a plastic card. If the tape peels easily and stitching appears intact, you have seam-tape peeling. If the thread is broken or frayed, you have stitching failure.
Repairing Seam-Tape Peeling
Step 1: Lift and clean the tape. Gently peel back the seam tape using a plastic card or soft tool (never metal). Clean the underside and fabric surface with rubbing alcohol to remove old adhesive residue, dirt, and debris. Let the area dry completely (typically 10-15 minutes).
Step 2: Choose your re-sealing product. Seam tape is faster for small peeling sections (under 6 inches), just remove backing and press firmly. Liquid seam sealer (like Seam Grip) is more durable for longer seams, apply to the underside, press down firmly, and wipe away excess.
Step 3: Cure and test. Allow the repair to cure per product instructions (typically 24 hours). Once cured, apply waterproof coating around the seam-tape edges using seam sealer or spray-on waterproofing to seal the boundary.
Repairing Stitching Failure
Hand stitching (for small failures under 2 inches): Use a heavy-duty needle and outdoor-rated thread.
Patching (for longer failures or when stitching isn't practical) If the stitching failure is longer than 2 inches, or if you're uncomfortable hand stitching, use a fabric patch to reinforce the seam.
Cut a patch from compatible tent fabric (or use a fabric repair patch). The patch should extend at least 1 inch beyond the damaged seam on all sides. Round the corners to prevent peeling.
Clean the area thoroughly with rubbing alcohol and allow it to dry. Apply fabric adhesive to both the patch and the seam area.
Allow the adhesive to cure fully (24 hours), then apply seam sealer around the patch edges and over the seam line itself.
When to Seek Professional Repair
Some seam failures are beyond home repair:
- Seam failures at stress points (corners, pole attachment areas, or where multiple seams meet) are under high load. A failed repair here can cause the tent to fail during use. Professional repair is safer.
- Multiple seam failures suggest systemic coating or material degradation. A single patch won't solve the underlying problem.
- Seam failures in the tent floor or body (not the rainfly) are more critical to tent integrity. Professional repair ensures the tent remains structurally sound.
- Damage to the tent's main structural seams (the seams that hold the tent shape under load) should be professionally repaired or the tent should be replaced.
If you're uncertain whether a repair is within your skill level, contact the tent manufacturer. Many offer repair services or can recommend a professional repair shop. The cost of professional repair is often less than replacing the tent.
Testing Your Repair and Long-Term Care
Before relying on your repaired rainfly, set up your tent and spray water on the patched area using a hose or spray bottle, starting gently and increasing pressure gradually. Pay special attention to patch edges, where water often enters.
Long-term care extends repair life: Store the tent dry, avoid extreme heat, inspect repaired areas periodically, clean gently, and use the tent regularly. A well-done repair lasts for years; many campers use patched tents for five years or more.
Repairing a tent rainfly saves money and extends gear life. Whether you choose a quick field fix or a permanent patch, the process is straightforward.
At GreatAdventureSupply, we understand that quality gear deserves quality care. Our selection of durable tents like the Pop-up Camping Tent for 2-3 People and the Trekker Tent 4 are built to withstand years of adventure.


Frequently Asked Questions
What's the best way to patch a tent rainfly?
The best approach depends on damage size and location. For small tears (under 2 inches), adhesive repair tape works well for quick fixes. For larger damage or permanent repairs, use a fabric adhesive patch with rounded corners, applied to a clean, dry surface. Always clean the area with rubbing alcohol first, let it dry completely, and allow the adhesive to cure for 24 hours before exposing the rainfly to rain. Seams and seam-tape failure require seam sealer applied along the entire compromised section.
Can you use duct tape to repair a tent rainfly?
Duct tape works as a temporary field repair but isn't ideal for long-term use. It peels easily in UV exposure and cold weather, and the adhesive can degrade the tent's PU coating. Tenacious tape or specialized tent repair tape is more durable and won't damage the fabric. For a permanent fix, use fabric adhesive patches or stitching combined with seam sealer.
How long does it take for tent repair tape to cure?
Most fabric adhesive patches cure in 24 hours at room temperature. Cold, damp weather extends cure time significantly, expect 48 hours or more in temperatures below 50°F or high humidity. Seam sealer typically requires 24-48 hours depending on the product. Avoid exposing your rainfly to rain or heavy moisture until the adhesive has fully cured to ensure a waterproof seal.
What materials work best for patching a rainfly?
Tenacious tape and specialized tent repair tape are the most reliable options for adhesive patches. For fabric compatibility, match the patch material to your rainfly, nylon patches for nylon rainflies, polyester for polyester. Ensure the patch size is at least 1-2 inches larger than the tear on all sides, with rounded corners to prevent peeling. Fabric adhesive designed for outdoor gear bonds better than general-purpose adhesives and resists UV damage.