 how-to
How to Fix a Broken Tent Pole: A Step-by-Step Guide
Table of Contents
- Assess the Damage and Identify the Broken Pole Section
- How to Splint a Tent Pole in the Field
- Fiberglass Tent Pole Repair at Home
- How to Replace Tent Pole Shock Cord
- Installing Tent Pole Replacement Sections
- When to Replace the Entire Pole Instead of Repairing
- Safety Precautions and Prevention
- Conclusion
- Frequently Asked Questions
Last Updated: October 19, 2026
Assess the Damage and Identify the Broken Pole Section
Learning how to fix a broken tent pole can save your camping trip from disaster. The damage location and type determine whether you need a quick field fix or a permanent repair at home.
Where is the damage located?
Tent poles break in predictable spots, mostly at the joints where sections connect. Shock cord stress, impact damage, or material fatigue creates weak points.
Check the pole ends first. Ferrules (the metal or plastic caps at pole ends) often crack or dent, and damage here is usually easy to fix. Next, inspect where sections slide together, since friction and movement cause cracks and bends. Finally, scan the middle sections for fractures.
Mark the damage with tape or a marker and take photos if you're planning a home repair. This helps you order the right replacement parts.
What type of damage are you dealing with?
Tent poles fail in three main ways: cracks, bends, and breaks. Each requires a different approach.
Cracks run lengthwise along the pole, weakening the structure without separating it. Fiberglass poles crack more often than aluminum. A cracked pole may hold under light tension but will fail under stress.
Bends flatten or curve the pole without breaking it. Aluminum bends more easily than fiberglass.
Complete breaks snap the pole into two or more pieces. This is the most serious damage: the section must be replaced or splinted securely, since you cannot camp safely with a completely broken pole.
How to Splint a Tent Pole in the Field
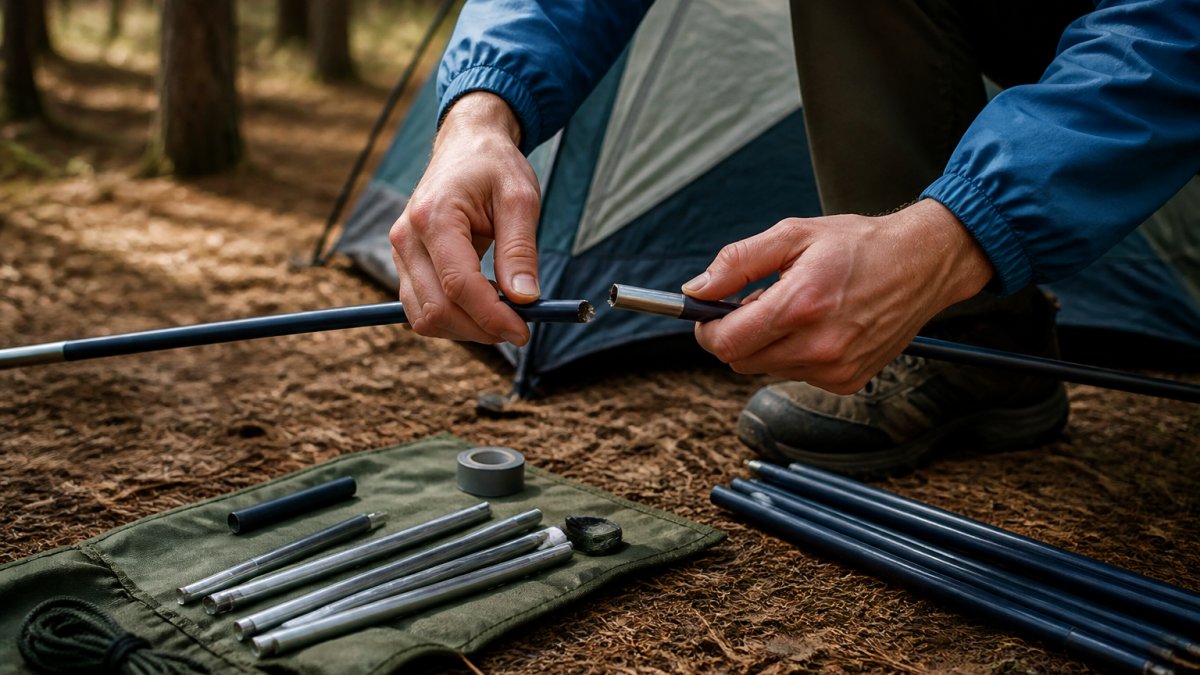
Understanding how to fix a broken tent pole with a splint, wrapping around the damaged section to reinforce it temporarily, is your best emergency repair option. It works best for cracks and small breaks, and takes 15 to 20 minutes with basic materials.
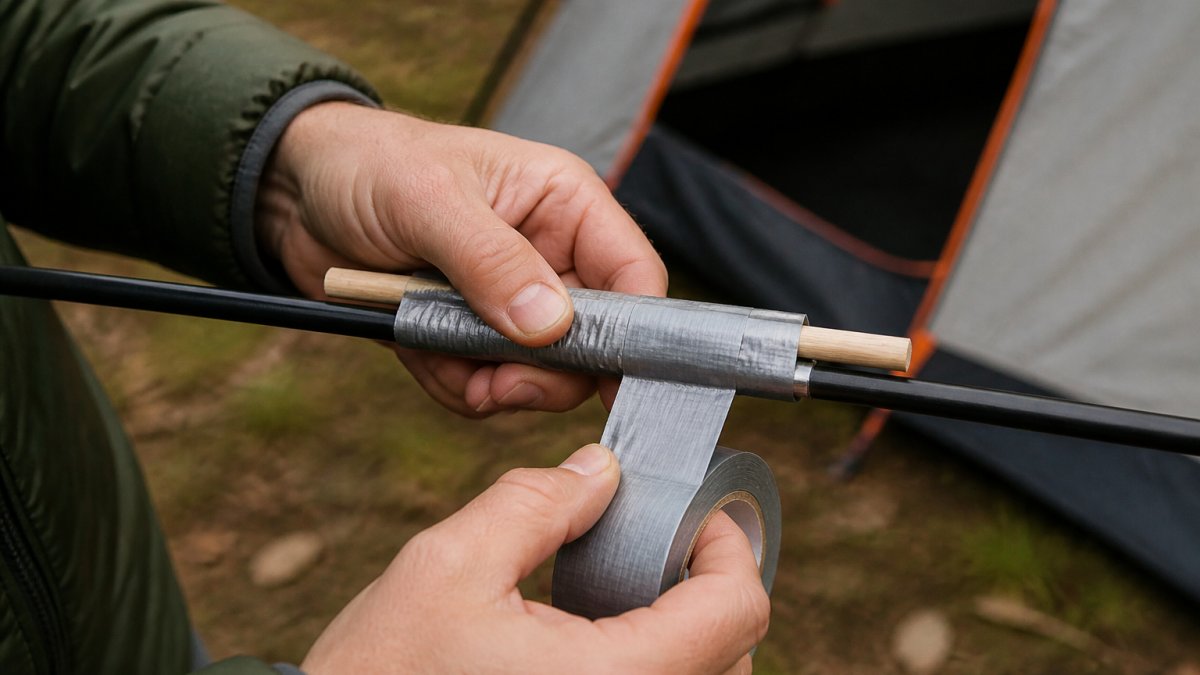
Materials you'll need for a field splint
Gather these items before you start:
- Duct tape (at least 6 feet)
- A splint material (thin wood, plastic, or metal rod)
- Elastic cord or shock cord (optional, for reinforcement)
- Knife or scissors
- Sandpaper or rough cloth (optional, for grip)
The splint material is critical: straight, lightweight, and slightly shorter than the damaged section. Tent repair kits often include it; otherwise improvise with a sturdy stick, a tent stake, or rolled-up plastic or aluminum foil.
Duct tape holds everything together, so bring extra and wrap it tightly around the splint and pole.
Step-by-step splinting process
Step 1: Align the splint (2 minutes) Position the splint alongside the damaged section, running parallel to the pole for its full length.
Step 3: Secure the ends (3 minutes) Wrap extra tape around both ends of the splint to prevent sliding, pressing firmly to seal the edges.
Step 4: Test the repair (2 minutes) Flex the pole gently. It should bend smoothly without cracking sounds. If you hear cracking, add more tape.
A splinted pole will support your tent for a few nights, but it's not permanent. Plan a proper repair when you get home.
Fiberglass Tent Pole Repair at Home
Fiberglass poles are common in modern tents: lighter than aluminum but more prone to cracking. A home repair takes 30 to 45 minutes.
Using a repair sleeve for fiberglass poles
A repair sleeve slides over the damaged section like a tube. It distributes pressure evenly and prevents the crack from spreading. Sleeves work best for cracks that don't go all the way through the pole.
Repair sleeves come in different diameters. Measure your pole diameter before ordering. Most tent poles range from 8mm to 12mm.
Slide the sleeve over the damaged section, centering the crack so the sleeve covers at least 2 inches of pole on each side. This distributes the load across a wider area.
Secure the sleeve with epoxy or polyurethane glue designed for fiberglass.
Gluing and wrapping cracked sections
For cracks that run deep into the pole, gluing and wrapping combines adhesive and tape reinforcement for extra strength.
Apply epoxy glue into the crack with a small stick or applicator, pushing it deep into the fracture.
Wrap the glued section tightly with repair tape or duct tape. Overlap each wrap by half the tape width. Make at least three full passes.
Let the repair cure for 24 hours; afterward the pole should be as strong as before the crack formed.
How to Replace Tent Pole Shock Cord
Shock cord (elastic cord) runs through tent poles to hold sections together. When it breaks, pole sections separate and your tent collapses. Replacing shock cord takes 20 to 30 minutes.
Unthreading the old shock cord
Shock cord runs from one end of the pole to the other, connecting all sections. To access it, you need to separate the pole sections.
Slide the pole sections apart gently. Don't force them. If they're stuck, wiggle them side to side while pulling. The cord will still be attached inside.
Once separated, locate the shock cord at each end. It's usually tied or glued to the pole ferrule (the end cap).
If the cord is stuck, use a straightened wire or thin stick to push it through from the other end.
Installing new elastic cord
Measure the old cord length. A replacement cord should be slightly shorter than the pole. This creates tension that holds sections together.
Thread the new cord through the pole. Start from one end and push it through the hollow center. A wire threader makes this easier.
Once the cord runs through the entire pole, tie it at both ends. Use a strong knot like a figure-eight knot.
Test the connection by sliding sections apart and back together. They should snap back into place smoothly. If they don't, the cord may be too loose.
Installing Tent Pole Replacement Sections
When a pole section is too damaged to repair, replacement is the best option. New sections cost less than a new tent. Outdoor retailers often carry replacement sections for common tent models.
Choosing the correct replacement section
Pole sections vary by diameter, length, and material. You need an exact match for your tent model.
Check your tent manual or manufacturer website for the correct pole section part number. Write down the diameter (usually 8mm to 12mm), length, and material (fiberglass or aluminum). Bring this information when ordering.
If you've lost the manual, measure the pole diameter with calipers or a ruler. Compare your measurements to replacement sections online.
Removing the damaged segment
Separate the pole sections by sliding them apart. Work gently to avoid damaging the shock cord. Once sections are loose, locate the damaged one. It will be the section with visible cracks, bends, or breaks.
Slide the damaged section out of the pole assembly. If shock cord is attached to that section, carefully untie or cut the cord. Don't damage the cord itself. You'll reuse it with the new section.
Inspect the connection points where the damaged section met neighboring sections. Clean away any dirt or debris. This helps the new section slide in smoothly.
Sliding in the new section
Position the new section where the damaged one was. Align it with the neighboring sections. The new section should slide in smoothly without forcing.
If you removed shock cord from the damaged section, reattach it to the new section using the same knot. The cord should be tight enough to hold sections together but not so tight it restricts movement.
Slide all pole sections back together. They should fit snugly with slight tension from the shock cord. Test the connection by gently flexing the pole. It should bend smoothly without gaps between sections.
When to Replace the Entire Pole Instead of Repairing
Some damage is too severe for repair. Knowing when to replace the whole pole saves money and frustration.
Replace the entire pole if multiple sections are damaged.
Replace the pole if the damage is near a connection point. Repairs at joints often fail under tension.
Replace the pole if the damage is more than 3 inches long.
Replace the pole if you've already repaired it once and it broke again. Repeated failures indicate material fatigue.
A new pole can be a cost-effective choice compared to multiple repair materials and your time.
Safety Precautions and Prevention
Tent pole repairs involve sharp edges, adhesives, and tools. Take basic safety steps to protect yourself and your gear.
Stay safe during repairs
Wear work gloves when handling broken poles. Sharp edges and splinters are common. Gloves protect your hands from cuts and scrapes.
Use adhesives in a well-ventilated area. Epoxy and polyurethane glue release fumes. Open windows or work outside.
Keep adhesives away from your skin and eyes. Wash your hands after handling glue.
Use sharp tools carefully. Knives and scissors can slip. Always cut away from your body. Keep tools sharp.
Let glue cure fully before using your tent. Incomplete curing means weak repairs that fail under load. Follow the adhesive manufacturer's curing time recommendations.
Maintain your poles to prevent future breaks
Prevention is easier than repair. Regular maintenance keeps poles strong and breaks rare.
Inspect poles before every trip. Look for cracks, dents, and loose sections.
Store poles in a dry location. Moisture causes fiberglass to weaken. Keep poles indoors during off-season storage.
Avoid bending poles beyond their design limits. Don't overload your tent with heavy gear. Strong winds put stress on poles.
Clean poles after each trip. Salt water and sand cause corrosion.
Replace shock cord every 5 to 7 years even if it hasn't broken. Elastic cord loses strength over time.
Conclusion
Last Updated: October 19, 2026
A broken tent pole doesn't mean the end of your camping trip. Quick field repairs get you through the night. Proper home repairs extend pole life for years. Visit our site to find reliable gear for your next adventure.
Frequently Asked Questions
Can tent poles be repaired, or do I need to replace them?
Most tent poles can be repaired if the damage is caught early. Cracks, bends, and breaks in individual segments respond well to splinting, gluing, or section replacement. However, multiple fractures, severe bends that won't straighten, or damage to the ferrule (the end connector) often mean replacement is safer and more cost-effective. Field repairs and home repairs work best on single-section damage; widespread structural failure requires a new pole to maintain tent integrity.
How do you splint a tent pole in the field?
Align the broken ends and wrap them tightly with repair tape or duct tape, then slide a splint (a stick, tent stake, or repair sleeve) along the break to reinforce it. Wrap the splint and pole together with multiple layers of tape, ensuring the break point is fully supported. This temporary fix stabilizes the pole enough to finish your trip. For a more durable field repair, use a repair sleeve designed for your pole diameter and secure it with adhesive before wrapping.
What's the difference between fiberglass and aluminum pole repairs?
Fiberglass poles are more forgiving: cracks can be glued and wrapped, and they respond well to repair sleeves. Aluminum poles are stiffer and prone to sharp breaks; they're harder to glue but easier to reinforce with sleeves. Fiberglass repairs often hold longer in the field because the material flexes slightly. Aluminum repairs require more precision to ensure the splint is tight enough. Both benefit from replacement sections if the damage is severe, but fiberglass cracks are more likely to be salvageable with adhesive alone.
How do I know what size replacement shock cord to buy?
Check your tent's manual or measure the original cord's diameter (typically 2-4 mm for most camping tents) and length when fully stretched. Count how many pole segments the cord connects; this tells you the total length needed. Buy replacement shock cord rated for the same or slightly higher tension. If unsure, bring your old cord or a pole segment to an outdoor retailer to match diameter and elasticity. Shock cord that's too loose won't keep segments aligned; too tight creates stress on the ferrules.