 how-to
Filter Water From a Silty Stream: Step-by-Step
Table of Contents
- Why Silty and Sandy Water Is Difficult to Filter
- How to Pre-Filter Water With Sediment
- How Long to Let Muddy Water Settle
- Choosing a Backpacking Water Filter for Silty Water
- How to Clean a Clogged Backpacking Water Filter
- Safe Collection and Field Treatment Procedure
- When to Use Alum and Other Coagulants
- Frequently Asked Questions
Last Updated: October 20, 2026
Why Silty and Sandy Water Is Difficult to Filter
Learning how to filter silty stream water poses a unique challenge for backpackers and campers. Unlike clear water sources, silty water contains fine suspended particles that clog filters quickly and reduce flow rates dramatically. These particles, silt, clay, sand, and organic debris, are small enough to pass through coarse screens but large enough to accumulate inside filter media.
The problem compounds when you're in the field. A standard backpacking water filter designed for clearer water sources can become clogged after processing just a few liters of silty water. Once clogged, the filter either stops working or requires frequent backflushing, which wastes water you may not have in abundance. This is why the process to filter silty stream water requires a different approach than filtering from a clear alpine lake.
At GreatAdventureSupply, we understand that outdoor adventures often take you to less-than-ideal water sources. The sediment in muddy water also makes disinfection less effective, fine particles shield bacteria and microorganisms from chemical treatment or UV light. This means you can't simply rely on one filtration method. You need a strategy that removes sediment first, then addresses remaining contaminants.
How to Pre-Filter Water With Sediment
Pre-filtering is your first defense against clogged filters. Before your water touches an expensive backpacking filter, run it through a coarse screen or cloth to remove larger debris and suspended particles. This simple step extends filter life by hours or days, depending on water clarity.
Basic cloth pre-filtering method:
- Use a clean bandana, coffee filter, or fine mesh cloth
- Stretch the cloth over a container or hold it cone-shaped over your water bottle
- Pour silty water slowly through the cloth
- Let gravity do the work, don't squeeze or force the water through
- Repeat if the water still looks cloudy after the first pass
A cloth pre-filter removes leaves, sand grains, and visible debris but won't catch fine silt or clay particles. That's fine, the goal is to reduce the load on your main filter, not achieve crystal-clear water at this stage.
For heavier sediment loads, use a coarse screen or mesh strainer (the kind used for cooking works well). Stack two or three screens of different sizes if you have them. Coarser screens go first, finer ones last. This layered approach removes progressively smaller particles.
The time investment is minimal, pre-filtering takes 2-3 minutes, but the payoff is significant. Your main filter won't clog as quickly, and you'll spend less time maintaining equipment in the field.
How Long to Let Muddy Water Settle
Settling is nature's filter. When you let muddy water sit undisturbed, sediment gradually sinks to the bottom through gravity. This process, called sedimentation, removes a surprising amount of suspended particles without any equipment.
Settling timeline for silty water:
- First 15 minutes: Larger sand particles and organic debris settle
- 30-60 minutes: Medium silt particles drop out
- 2-4 hours: Fine clay and remaining suspended solids settle
- Overnight: Maximum sediment removal (if you can wait)
The longer you wait, the clearer your water becomes. However, field conditions rarely allow overnight settling. A practical compromise is to let water settle for at least 30-60 minutes while you set up camp, cook a meal, or prepare gear.
To use settled water, carefully pour or siphon from the top of the container, leaving the sediment layer at the bottom untouched. Avoid disturbing the settled particles, even gentle agitation resuspends fine silt back into the water column.
This method works best when you have extra water containers. Fill one container with silty water and let it settle while you use water from another source or a second container. Many backpackers carry an extra collapsible water bag specifically for settling.
Choosing a Backpacking Water Filter for Silty Water
Not all water filters handle sediment equally. Ceramic filters, hollow-fiber membranes, and glass-fiber media all have different tolerances for silty water. Choosing the right filter for your expected water sources matters.
Ceramic filters are excellent for silty conditions. The ceramic material is durable, clogs slowly, and can be cleaned by backflushing with a syringe or plunger. GreatAdventureSupply carries the Outdoor water purifier with wilderness survival emergency rescue capabilities, which features a double-membrane ceramic filter cartridge designed for surface water and groundwater.

Hollow-fiber filters are lighter and compact but clog faster in silty conditions. Use these primarily for clearer water sources or as a secondary filter after settling and pre-filtering.
Glass-fiber filters offer a middle ground. They're compact and reasonably fast, but they can't be backflushed effectively. Once clogged, you're done with that filter element.
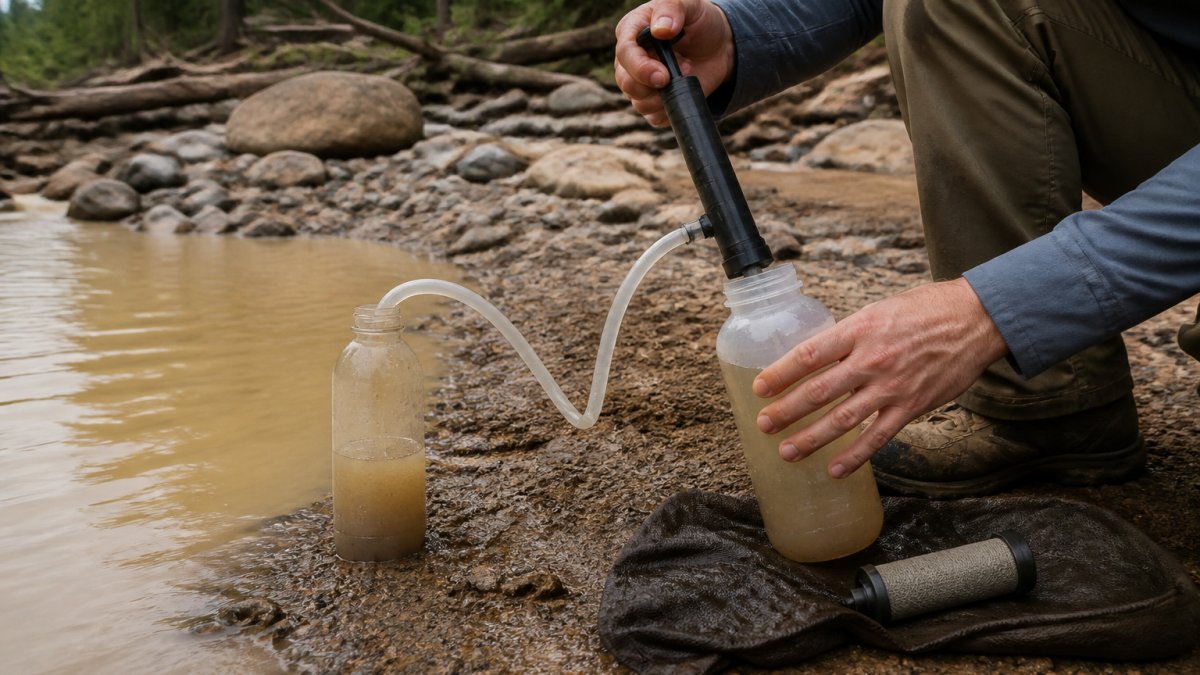
For silty stream water specifically, ceramic or pump-based systems are your best bet. Pump filters give you control over flow rate and allow you to backflush when needed. Gravity filters are convenient but may clog and stop flowing if sediment loads are high.
Consider also the filter's stated flow rate and capacity. A filter rated for 0.3 liters per minute may slow dramatically when processing silty water. Expect 50-70% of the advertised flow rate when filtering sediment-heavy sources.
How to Clean a Clogged Backpacking Water Filter
A clogged filter is inevitable if you're filtering silty water regularly. The good news: most field-cleanable filters can be restored to working condition with simple maintenance.
Backflushing method for ceramic filters:
Outdoor water purifier, wilderness survival emergency rescue water filter →
- Stop filtering when flow slows noticeably
- Fill a syringe or plunger with clean water (or water from a different source)
- Connect the syringe to the outlet side of the filter (reverse direction)
- Push water back through the filter firmly
- Repeat 3-5 times until flow improves
- Resume normal filtering
This process dislodges trapped sediment from the ceramic surface. You may need to backflush every 1-2 hours when processing very silty water.
For filters without backflushing capability, soak the filter element in clean water for 10-15 minutes. Gently brush the surface with a soft brush or cloth to remove sediment. This won't restore full flow but may improve it enough to continue.
If your filter is completely clogged and can't be revived in the field, you have limited options. Carry a backup filter element or a secondary filtration method (settling, cloth pre-filters, boiling) as insurance. This is why many experienced backpackers carry two filters or filter elements on extended trips through sediment-prone areas.
Safe Collection and Field Treatment Procedure
Proper water collection and treatment requires a systematic approach. Here's the step-by-step procedure we recommend for silty stream water:
Step 1: Choose your collection point
- Select a section of the stream away from the main current where sediment has settled
- Avoid areas with visible algae, discoloration, or dead animals
- If possible, collect from flowing water rather than stagnant pools
- Move at least 200 feet downstream from camp or animal activity
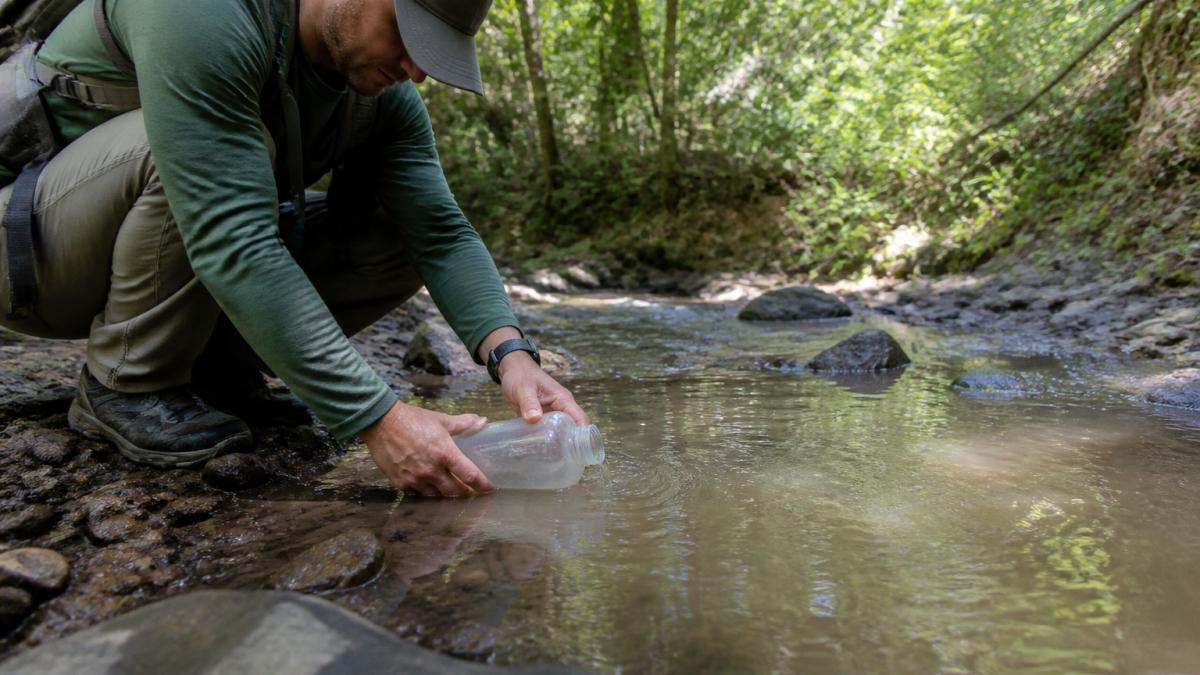
Step 2: Collect water carefully
- Use a dedicated water container (not one used for other purposes)
- Fill slowly and avoid disturbing the streambed
- Leave the first few inches of water undisturbed if collecting from a settling pool
- Keep the container covered during transport to prevent contamination
Step 3: Let water settle (if time permits)
- Pour collected water into a clean container
- Wait 30-60 minutes while you set up camp
- Avoid moving or shaking the container during settling
Step 4: Pre-filter the settled water
- Carefully pour water from the top into your pre-filter (cloth or screen)
- Let gravity pull water through without forcing it
- Discard the sediment layer at the bottom of the settling container
Step 5: Filter through your main filter
- Use your backpacking water filter according to manufacturer instructions
- Expect slower flow with sediment-laden water
- Stop and backflush if flow drops significantly
- Collect filtered water in a clean container
Step 6: Disinfect if needed
- For maximum safety, boil the filtered water for 1 minute (3 minutes above 6,500 feet elevation) (the CDC)
- Alternatively, add chemical disinfectant (chlorine tablets or similar) per package instructions
- Let treated water cool before drinking
This multi-step approach removes sediment, reduces contaminants, and ensures the safest drinking water possible from questionable sources.
When to Use Alum and Other Coagulants
Coagulants like alum are chemical additives that bind fine particles together, making them settle faster and easier to remove. They're useful when you have very turbid water and limited time for natural settling.
How alum works: Alum causes suspended clay and silt particles to clump together into larger, heavier particles that settle quickly. This process, called coagulation, reduces turbidity dramatically in 15-30 minutes instead of hours.
When to use alum:
- You have extremely turbid water with high sediment loads
- Time is limited and you need drinkable water quickly
- Other pre-filtration methods aren't available
- You're filtering water for cooking or non-drinking use (less critical but still beneficial)
How to use alum in the field:
- Dissolve a small amount of alum powder in clean water (follow package instructions for dosage)
- Add the alum solution to your muddy water container
- Stir vigorously for 1-2 minutes
- Let the mixture settle for 15-30 minutes
- Carefully pour off the clear water from the top
- Discard the sediment layer at the bottom
- Pre-filter and treat the clarified water as usual
Important limitations: Alum removes sediment but does NOT disinfect water. You still need to filter or boil to remove bacteria and microorganisms. Alum is also a chemical additive, use it sparingly and only when necessary. Some people prefer to avoid chemicals in backcountry water treatment.
Alternative coagulants include chitosan (made from shellfish) and specialized commercial clarifying agents. These work similarly to alum but may be gentler or more palatable to some users. Check product instructions before use.
| Method | Time Required | Removes Sediment | Removes Microbes | Equipment Needed |
|---|---|---|---|---|
| Settling alone | 2-4 hours | Yes (70-80%) | No | Extra container |
| Cloth pre-filter | 5 minutes | Yes (coarse only) | No | Cloth or screen |
| Alum treatment | 30 minutes | Yes (90%+) | No | Alum powder, container |
| Ceramic filter | 10-30 minutes | Yes | Yes | Filter unit |
| Boiling | 5-10 minutes | No | Yes | Heat source |
| Combined method | 1-2 hours | Yes (95%+) | Yes | Multiple items |
Filtering water from a silty stream requires patience and the right combination of methods. Start with settling and pre-filtering to remove visible sediment, then use your backpacking filter to address remaining particles and microorganisms. The GreatAdventureSupply Outdoor water purifier with ceramic membrane filtration is specifically designed for exactly this challenge, it handles turbid water effectively and can be field-cleaned when sediment loads are high.
Frequently Asked Questions
How do you filter water from a silty stream?
The most effective approach combines three stages: prefilter with cloth or a coarse screen to remove large debris, let the water settle for 12-24 hours in a container so fine particles sink, then run the clearer water through a backpacking water filter. For heavily silted water, add alum to speed settling. This multi-step process prevents filter clogging and extends filter life significantly.
Should you let silty water settle before filtering it?
Yes. Settling removes 50-70% of silt and sand before it reaches your filter, dramatically reducing clogging risk. Use a settling container or extra water bags and allow 2-4 hours for sediment to drop. Decant the clearer water from the top carefully without disturbing the settled layer at the bottom. This step is especially critical if your backpacking water filter has a fine ceramic or membrane cartridge.
Can a backpacking water filter remove silt?
Most backpacking water filters can remove some silt, but prefiltering and settling first is essential. Filters with coarse screens handle light sediment, while fine ceramic membranes clog quickly if exposed to heavy silt. The Outdoor Water Purifier with ceramic membrane filters ($70.22) removes fine particles but works best when water is prefiltered and settled first. Always prefilter to protect your filter and maintain flow rate.
What should you do if a water filter clogs with sediment?
Backflush the filter by reversing water flow through it, or soak the cartridge in clean water and gently brush the surface. For ceramic filters, use a soft brush or cloth to clean the outer membrane. If clogging is severe, replace the cartridge. Prevention is easier than repair: always prefilter, let sediment settle, and use a cloth screen before filtering silty water to extend your filter's life and maintain adequate flow.