 how-to
DIY Outdoor Gear Maintenance Tips: Complete Guide
Table of Contents
- Inspect Your Gear Before and After Every Trip
- How to Clean Backpacking Gear Properly
- Maintaining Waterproof Jackets and Rain Pants
- Build and Pack an Outdoor Gear Repair Kit
- Field Repair for Camping Gear: Quick Fixes on the Trail
- How to Store Camping Gear Between Trips
- Drying Gear Safely and Testing Repairs
- When to DIY and When to Seek Professional Repair
- Frequently Asked Questions
Last Updated: October 15, 2026
Inspect Your Gear Before and After Every Trip
Inspecting your outdoor gear before and after every trip is the foundation of DIY outdoor gear maintenance. This five-minute habit catches small problems before they become expensive failures on the trail.
Before you leave, check seams for separation, zippers for smooth operation, and fabric for tears or punctures. Run your hands along seams and stress points, feel for weak spots in straps and attachment points, and test zippers and buckles.
After your trip, repeat the process while your gear is fresh in your mind, since mud and debris are easier to spot when wet. Document issues in a notebook or phone note to create a maintenance log.
Pay special attention to high-stress areas: the base of tent poles, pack shoulder straps, and sleeping bag seams. Catching a small tear in your tent floor before it becomes a six-inch rip saves money and keeps bugs out.
How to Clean Backpacking Gear Properly
Proper cleaning extends the life of your outdoor gear. Dirt, sweat, and moisture break down fabrics and coatings, so a regular routine prevents damaging buildup.
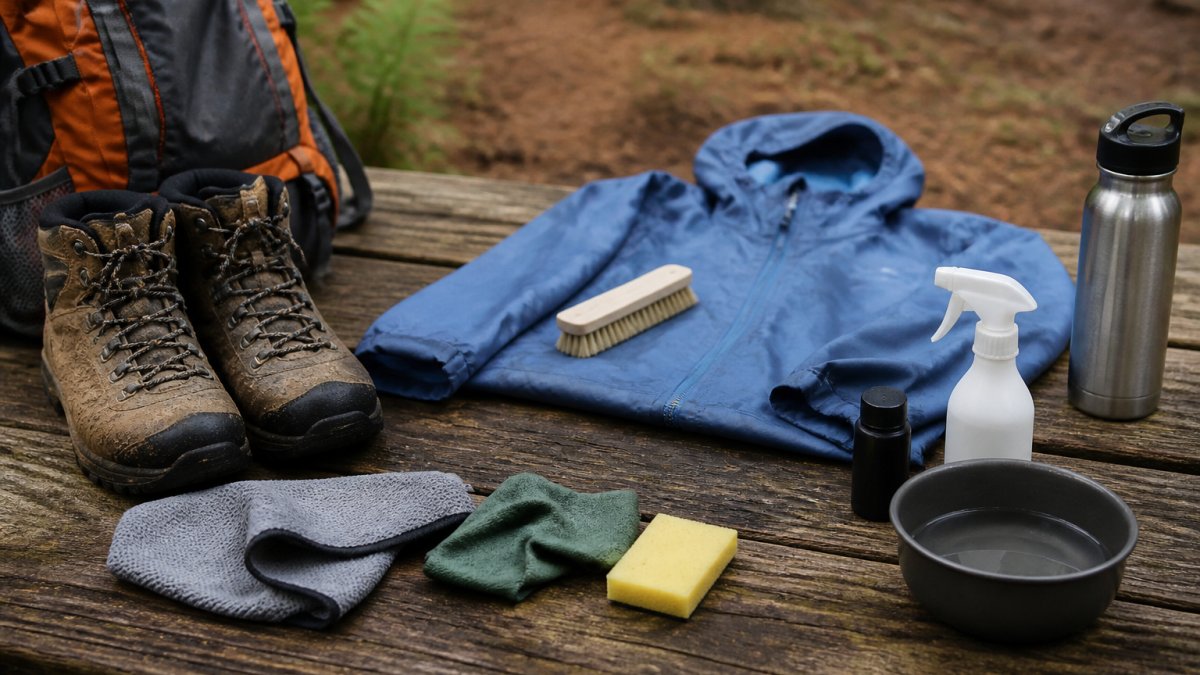
Most gear doesn't need harsh chemicals or hot water. Use cool water and mild soap, and submerge items in a sink or bucket rather than spraying with a hose, which forces water into seams and damages waterproof coatings.
For visible mud, let it dry first, then brush it off with a soft brush before washing. This two-step process is faster than washing muddy gear directly.
Cleaning Technical Fabrics and Nylon
Technical fabrics like nylon have special coatings that water and soap can damage. Use cool water and a small amount of mild detergent designed for technical fabrics.
Submerge your nylon gear in cool soapy water for 10-15 minutes, agitate gently, and use a soft brush on stubborn stains. Rinse thoroughly until all soap is gone, since residue attracts dirt.
Never use hot water, bleach, or strong detergents on technical fabrics. Heat damages coatings and shrinks materials, while harsh chemicals break down the finishes that make them water-resistant.
Dry your nylon gear flat or hanging in shade. Direct sunlight can fade colors and degrade some coatings. Air drying is always the safest choice for technical materials.
Washing and Restoring Down Insulation
Down insulation requires special care because water damages the loft that creates warmth, and wet down takes a long time to dry.
If down gear gets wet on the trail, dry it as soon as possible. Wash down items only when necessary, using cool water and specialized down soap, since regular detergent leaves residue that reduces loft.
Submerge the item in cool soapy water and gently squeeze the water through the fabric without wringing or twisting. Rinse multiple times until all soap is gone, since residue damages the down.
Dry down gear in a dryer on low heat with clean tennis balls, which help fluff the down. Check every 30 minutes and shake gently to break up clumps.
Maintaining Waterproof Jackets and Rain Pants
Waterproof jackets and rain pants have special coatings that shed water but wear away with use. Regular maintenance keeps them effective and extends their life.
Clean waterproof gear gently with cool water and mild soap, avoiding fabric softeners and bleach. Dry completely after washing.
Once clean and dry, apply a durable water repellent treatment by spraying or soaking, following product instructions. Heat-setting with a dryer or iron helps it bond to the fabric.
Test your waterproof gear by pouring water on it. The water should bead up and roll off. If water soaks in instead of beading, your gear needs a fresh coat of water repellent treatment. This simple test tells you when maintenance is due.
Build and Pack an Outdoor Gear Repair Kit
A well-stocked repair kit lets you fix problems on the trail before small issues ruin your trip.

Start with fabric patches: self-adhesive for quick fixes on nylon and synthetics, sew-on for durable repairs. Include neutral colors that match your gear.
Add a small sewing kit with needles and neutral thread for tears and loose seams.
Include seam sealer, a liquid adhesive applied to seams to prevent leaks. It's essential for tent seams and waterproof gear.
Pack repair tape, ideally waterproof gear tape rather than regular duct tape. Wrapping duct tape around a pencil saves space.
Add a multi-tool or small knife for cutting patches and countless other tasks.
Include spare parts specific to your gear, like a replacement buckle or tent grommet.
For your repair kit container, consider the Ultralight Zipper Box Organizer from GreatAdventureSupply. This compact storage solution keeps everything organized and protected.
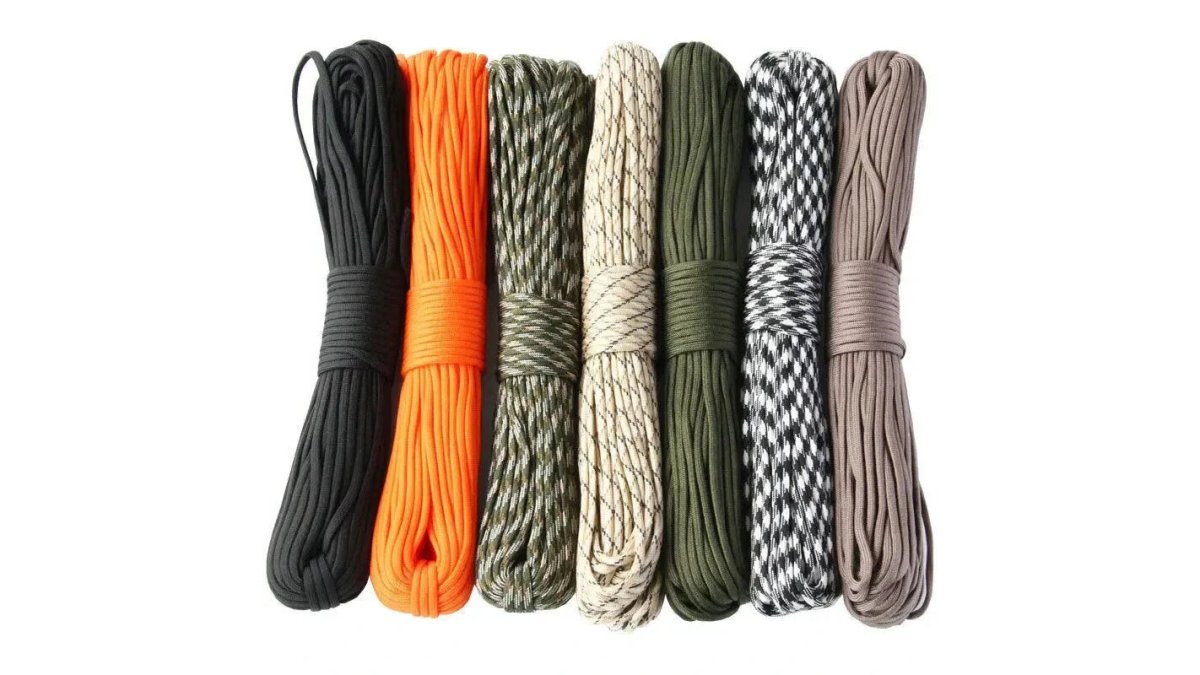
Consider the 7-Core 550 Paracord Rope for emergency repairs and shelter building. The 550 lb breaking strength handles most outdoor tasks.
Field Repair for Camping Gear: Quick Fixes on the Trail
When gear fails on the trail, you need fast repairs that hold until you get home. Field repairs are temporary solutions that keep your trip going safely.
Repairing Fabric Tears and Punctures
Small tears and punctures are the most common gear failures. A quick patch gets you through the rest of your trip.
For tears in nylon or synthetic fabrics, use a self-adhesive patch. Clean the area around the tear with a dry cloth. Remove any debris or moisture. Cut a patch slightly larger than the tear. Press the patch firmly over the tear, holding it for 30 seconds.
7-Core 550 Paracord Rope – 4mm Polyester Survival Cord for Camping, Hiking →
For seams that are separating, apply seam sealer if you have it. Clean the seam area and let it dry completely. Apply seam sealer according to product instructions. Most products require 24 hours to cure fully, but they provide temporary waterproofing within an hour.
For larger tears that you can't patch with adhesive, sewing is more durable. Thread your needle and tie a knot at the end. Push the needle through both sides of the tear, making small stitches about a quarter inch apart. Work from one end of the tear to the other.
Fixing Zipper and Buckle Issues
Stuck zippers are frustrating but usually fixable. The problem is usually dirt or debris in the zipper teeth. Try pulling the zipper slider very gently back and forth. Sometimes this works the debris out.
If gentle pulling doesn't work, apply a dry lubricant. Graphite pencil works well, rub the pencil on the zipper teeth. Wax or silicone spray also works. Avoid oil-based lubricants, which attract dirt.
If the zipper slider itself is broken, you may be able to replace it. Carry a spare slider that fits your zippers. Remove the old slider by cutting the stop at the end of the zipper. Slide the new slider onto the zipper teeth. This repair works for most zippers.
For broken buckles, a temporary fix is to tie a knot in the strap instead of using the buckle. This works for pack straps and other non-critical attachments. For critical buckles like those on your pack's hip belt, carry a replacement buckle.
How to Store Camping Gear Between Trips
Proper storage keeps your gear in good condition during the off-season. Moisture, heat, and pests damage gear that's stored carelessly.
Store your gear in a cool, dry place. Basements and attics work well if they stay dry. Avoid hot spaces like attics in summer or uninsulated sheds.
Make sure everything is completely dry before storing. Moisture causes mold and mildew, which damage fabrics and create health hazards.
Store sleeping bags uncompressed. Compression bags are fine for travel, but extended compression damages down and synthetic insulation.
Keep tents and tarps loosely rolled or hung. Do not fold them the same way every time, as this creates stress points.
Store your repair kit in a waterproof container in an accessible location. You want to find it quickly when you need it.
Use the Dry Bags Roll Top Ultralight from GreatAdventureSupply to organize and protect smaller items.
Keep an inventory list of your gear. Note what you own, its condition, and when you last used it.
Drying Gear Safely and Testing Repairs
Drying your gear correctly prevents damage and ensures repairs work properly. The method depends on what you're drying and the material.
Air drying is the safest method for most gear. Hang items in shade with good air circulation. Shade prevents sun damage to fabrics and coatings.
Never use high heat to dry outdoor gear. High heat damages waterproof coatings, shrinks fabrics, and can melt synthetic materials.
For down gear, low heat in a dryer with tennis balls is the best method. The tennis balls help fluff the down as it dries.
Once your gear is dry, test any repairs you made. For waterproof repairs, pour water on the repaired area and watch for leaks.
For seam repairs, gently pull on the seam to test the stitching. If stitches pull loose, the repair needs reinforcement.
Test waterproof jackets and rain pants by pouring water on them. Water should bead up and roll off. If it soaks in, apply another coat of water repellent treatment.
When to DIY and When to Seek Professional Repair
Some repairs are simple enough to handle yourself. Others require professional equipment or expertise. Knowing the difference saves money and prevents making things worse.
DIY repairs work well for:
- Small tears and punctures under two inches
- Stuck zippers that respond to cleaning or lubrication
- Loose seams that you can hand-stitch
- Broken buckles or straps you can replace
- Cleaning and waterproofing treatments
- General maintenance and inspection
Professional repairs are better for:
- Large tears or damage affecting structural integrity
- Seam failures that affect waterproofing
- Zipper replacement when the slider can't be fixed
- Down insulation that's clumped or damaged
- Waterproof coating that's peeling or failing
- Damage to the tent floor or critical stress points
- Complex repairs requiring special equipment
Consider the cost of repair versus replacement. A simple patch costs almost nothing and takes 10 minutes. A professional repair for the same damage might cost $20-50. If your gear is old or inexpensive, DIY repair makes sense. If your gear is valuable or the damage is extensive, professional repair is worth the investment.
| Repair Type | DIY Difficulty | Time Required | Professional Cost Range | Best Choice |
|---|---|---|---|---|
| Small fabric tear | Easy | 5-10 minutes | $15-25 | DIY |
| Stuck zipper | Easy | 5-15 minutes | $20-35 | DIY |
| Seam separation | Medium | 15-30 minutes | $25-50 | DIY or pro |
| Large tear | Medium | 30-60 minutes | $35-75 | DIY or pro |
| Down clumping | Hard | 1-2 hours | $50-100 | Professional |
| Waterproof coating | Easy | 20-30 minutes | $30-60 | DIY |
Keep records of repairs you make. Note what failed, how you fixed it, and whether the repair held. This information helps you spot patterns and plan maintenance.
Proper outdoor gear maintenance keeps your equipment reliable and extends its life significantly. The tips we've covered, inspection, cleaning, repair, and storage, are straightforward tasks that don't require special skills or expensive tools. Start with regular inspection before and after trips, add cleaning to your routine, and build a simple repair kit.
Frequently Asked Questions
How often should you clean outdoor gear?
Clean outdoor gear after every trip, especially if exposed to mud, salt water, or heavy use. For regular camping gear used in dry conditions, cleaning every 3-4 trips is sufficient. Waterproof jackets and down insulation need gentler, less frequent cleaning, typically once per season or after heavy soiling. Inspect all gear before storing it away for the off-season.
What basic tools should you keep in an outdoor gear repair kit?
A field repair kit should include: needle and thread, fabric patches, repair tape, a small multi-tool, duct tape wrapped around a card, spare zipper sliders, replacement buckles, paracord (like the 7-Core 550 Paracord Rope at $20.74), isopropyl alcohol for cleaning, a soft brush, and adhesive patches. Store these in a compact zipper organizer like the Ultralight Zipper Box ($21.95) to keep everything accessible and lightweight.
How do you dry camping gear before storing it?
Always air-dry gear completely before storage to prevent mold and mildew. Hang items in a well-ventilated area away from direct sunlight and high heat. Down insulation requires extra care: gently shake it periodically while drying to restore loft. Avoid machine dryers or direct heat sources. Once fully dry, store gear in cool, dry conditions using breathable containers or dry bags to maintain protection without trapping moisture.
Can you repair outdoor gear in the field, or should you wait until home?
Simple repairs can be handled in the field to prevent further damage: patch small fabric tears with repair tape, fix zipper issues with a multi-tool or lubricant, and secure loose seams with needle and thread from your repair kit. Major damage to seams, waterproof coatings, or structural components should wait until home where you have better tools, light, and materials. Preventive maintenance and quick field fixes extend gear life significantly.