 how-to
How to Pack a Camping Backpack for Comfort
Table of Contents
- What You'll Need Before You Start Packing
- Backpack Weight Distribution Guide: Where Every Item Goes
- Step-by-Step: Packing Your Camping Backpack for Comfort
- How to Pack a Sleeping Bag in a Backpack
- How to Adjust Backpack Straps for Comfort
- Packing for Specific Climates and Body Types
- Troubleshooting Common Packing Pain Points
- Frequently Asked Questions
Last Updated: September 18, 2026
What You'll Need Before You Start Packing
Packing a camping backpack for comfort starts with one idea: your heaviest gear belongs closest to your spine.
Before you load a single item, gather these basics:
- Your loaded pack, empty and open
- A waterproof pack liner or dry bags
- Packing cubes or stuff sacks
- A sleeping bag and sleeping pad
- Your tent or shelter
- Water reservoir or bottles
- Trekking poles, if you use them
- A kitchen kit and food bag
- A rain cover
REI's guide to backpacking gear basics
Backpack Weight Distribution Guide: Where Every Item Goes
Weight distribution arranges gear so the load moves with your body instead of pulling against it. A well-packed camping backpack keeps the center of gravity close to your hips and spine.
The 60/40 Rule for Load Placement
The 60/40 rule builds a balanced pack: roughly 60% of your weight in the middle, near your spine, with the bottom and top carrying the lighter 40%.
Here's the order that works for most trips:
- Bottom: Sleeping bag, spare clothes, light items
- Middle (against your back): Food, water, stove, heavy tools
- Top: Rain jacket, snacks, first aid kit
- Outside pockets: Items you need fast
Lateral Balance and Pack Stability
Lateral balance means equal weight on both sides. An unbalanced pack twists as you walk, tiring your hips and lower back.
Step-by-Step: Packing Your Camping Backpack for Comfort
Follow this sequence and you'll build a balanced, stable load every time.
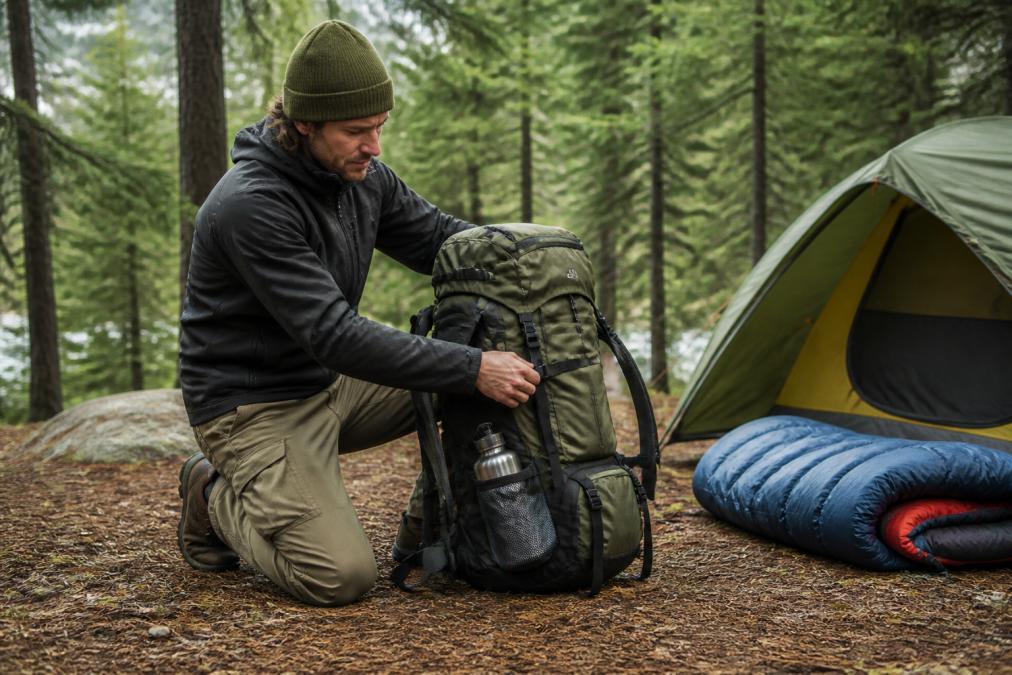
Bottom, Middle, and Top Zones
Start at the bottom. Line your pack with a waterproof liner, then place your sleeping bag and spare clothes in the base, light and bulky, they belong low.
External Attachment Points and Compression
Use external attachment points for bulky, light items like your sleeping pad or tent poles. Keep heavy gear out of side pockets, since weight that far from your spine pulls you off balance.
How to Pack a Sleeping Bag in a Backpack
The best place for a sleeping bag is the bottom of your pack, inside a waterproof liner or dry bag. Sleeping bags are light and compress well, ideal for the base of the load.
You have two solid options:
- Stuff it loose in the bottom of a lined pack. This fills gaps and saves space.
- Use a stuff sack for a tighter, more organized load.
How to Adjust Backpack Straps for Comfort
Adjust your straps in order: hip belt, shoulder straps, sternum strap, then load lifters. The right order makes a camping backpack feel light instead of heavy.
Hip Belt, Sternum Strap, and Load Lifters
The hip belt carries most of the weight. Fasten it over your hip bones, not your waist, and tighten until snug, 60-70% of the load should sit here.
Multifunctional Tactical Backpack for →
Packing for Specific Climates and Body Types
Most packing guides give one load plan and call it done, assuming a mild, dry weekend and an average build. Change the season or the body carrying the pack and the same gear must be arranged differently, this is where comfort is won or lost.
Cold and Wet Weather Packing
Cold-weather loads are heavier and bulkier, and mistakes cost more. Insulation loses its ability to trap heat when wet, so waterproofing becomes structural.
- Keep the sleeping bag and spare insulation in a dedicated dry bag, not just a pack liner. A single liner protects against rain; a dry bag protects against a leaking hydration bladder and a soaked rain fly stuffed in beside it.
- Move your puffy layer toward the top or into a lid pocket. You will stop and add it the moment you cool down at a break, and digging through a full pack in cold wind is miserable.
- Account for fuel and food weight. Cold trips mean a stove, more fuel, and calorie-dense food, all of which are dense. That weight belongs in the middle zone against your spine, not strapped outside.
- Expect a heavier base weight. A winter load can easily run several pounds above a summer load, which is exactly why the hip belt, not the shoulder straps, has to carry it.
Hot and Dry Weather Packing
Warm-weather packing is a hydration problem in disguise. Water is the heaviest single item most hikers carry and the one you consume and refill, so its weight changes through the day.
- Center the reservoir against your back. A full bladder is dense and sits close to your spine, which is exactly where heavy weight belongs. As you drink it down, the load gets lighter and stays balanced.
- Carry a bottle on the outside for quick sips so you are not stopping to pull the reservoir out of a packed bag.
- Plan refill points. On a dry stretch you may leave camp with several liters, which can add meaningful weight. Know where the next reliable source is so you are not carrying a full day of water uphill for no reason.
- Pack light, breathable layers on top. You will shed and re-add them constantly, so they need to be reachable without unpacking.
Body Type and Pack Fit
The biggest comfort variable isn't how you fold your sleeping bag, it's whether the pack's torso length matches yours. Torso length, from the base of your neck to the top of your hip bones, decides where the hip belt lands: above your hip bones and weight rides your waist and lower back; below and the pack sags.
- Shorter torsos: keep dense items slightly lower in the middle zone and lean on the hip belt for load transfer. A pack with an adjustable or shorter torso range will fit far better than a fixed one.
- Longer torsos: you have more room to carry weight in the upper-middle zone without losing balance, but you also need load lifters that actually reach the top of your shoulders to pull the pack in.
- Wider hips: look for a hip belt with a wider range of adjustment and padded, contoured wings. A belt that only tightens at the center will dig in at the sides.
- Narrower frames: a hip belt that is too wide will not wrap, so it cannot transfer weight. Fit matters more than padding here.
Uneven Terrain: Shifting Your Center of Gravity
On flat trail, a higher center of gravity is fine. On scrambles, steep descents, and rocky ground, it's a liability.
- For scrambling and steep descents, keep the heaviest gear centered and low in the middle zone. A lower center of gravity keeps you from feeling top-heavy when you lean into a slope.
- For long flat or rolling miles, you can let weight ride a little higher and closer to your shoulders, which many hikers find less tiring over distance.
- Trekking poles add a third and fourth point of contact and take load off your knees on descents, which changes how much your pack's weight bothers you by the end of the day.
Troubleshooting Common Packing Pain Points
Most comfort problems trace back to a specific packing or fit error. Once you know which error causes which symptom, you can fix it on the trail in a minute. Use this as a diagnostic, not a checklist.
Why Does My Back Hurt? Matching Symptoms to Causes
| Symptom | What It Usually Means | The Fix |
|---|---|---|
| Shoulders ache or go numb | Hip belt is loose or sitting too high, so the shoulders are carrying load they were not meant to | Re-tighten the hip belt over your hip bones so 60-70% of the weight transfers to your skeleton |
| Pack pulls away from your shoulders | Load lifters are too loose, or the pack's torso length is too long | Gently tighten the load lifters; if that does not help, the pack is likely the wrong torso size |
| Lower back aches | Weight is too high or too far from your spine | Move dense items down and inward, toward your hips |
| Pack sways or twists side to side | Uneven left-right weight, or compression straps are loose | Rebalance both sides, then tighten all compression straps so the load moves as one unit |
| Shoulder straps dig in or chafe | Load lifters cranked too tight, or sternum strap too high | Loosen the load lifters slightly and drop the sternum strap to a comfortable height |
| Hips or waist bruised | Hip belt too tight, or positioned on the waist instead of the hip bones | Loosen slightly and reseat the belt lower, over the bony points of your hips |
| Pack feels top-heavy and tips you forward | Too much weight in the top zone | Shift dense items down into the middle zone |
| Pack drags and feels bottom-heavy | Too much weight in the base | Move some weight up into the middle, keeping it close to your spine |
The Diagnostic Sequence
When something hurts, work through it in this order rather than guessing:
- Check the hip belt first. It carries the majority of the load. If it is loose or in the wrong place, every other symptom follows from it.
- Check lateral balance. Lift the loaded pack by the haul loop. If it tips, move items until it hangs level.
- Check front-to-back balance. Lean forward slightly while wearing the pack. A pull at your shoulders means weight is too high or too far from your spine.
- Check compression. A pack that shifts with every step is not compressed enough, and shifting load rubs and tires you out.
- Check the load lifters last. They fine-tune the top of the pack, but they cannot compensate for a bad hip belt or a mis-sized torso.
On-Trail Adjustments
Small tweaks beat suffering. If your shoulders ache after an hour, reseat the hip belt. If the pack sways on a descent, tighten the compression straps. If you feel top-heavy on rocky ground, move your heaviest item down into the middle zone at your next break.
American Hiking Society's trail safety resources
Frequently Asked Questions
What is the best way to distribute weight in a camping backpack?
Place heavy items like your stove, food, and water close to your spine and at mid-back level, roughly between your shoulder blades and hip belt. This keeps your center of gravity near your body's natural balance point. Lighter items like your sleeping bag and clothes go toward the bottom, while items you need during the day go on top. A well-distributed camping backpack should feel stable and allow you to stand upright without leaning forward.
How do you pack a sleeping bag in a backpack?
Stuff your sleeping bag into a waterproof stuff sack or compression bag, then place it at the bottom of your pack's main compartment or in a dedicated sleeping bag compartment if your pack has one. Compressing it first saves space and keeps it from shifting. If your pack lacks a bottom compartment, put the bag in a waterproof liner before loading it. Keep the bag away from sharp objects and make sure it is fully dry before packing to prevent moisture damage.
Does packing order affect hiking comfort?
Yes, significantly. A top-heavy pack pulls you backward and strains your shoulders, while a bottom-heavy pack forces you to lean forward and tires your lower back. The ideal setup keeps the heaviest weight at mid-back, close to your spine. Adjusting your hip belt, sternum strap, and load lifters after packing also matters. Even a perfectly packed camping backpack will feel uncomfortable if the straps are not fitted to your torso length and body shape.
How heavy should a camping backpack be?
A common guideline is to keep your loaded pack at 20 percent or less of your body weight. For a 150-pound adult, that means roughly 30 pounds maximum. Base weight, which is your pack and gear without food and water, typically ranges from 10 to 20 pounds for weekend trips. Weigh your pack before you leave and remove anything you did not use on your last trip. Reducing weight is one of the fastest ways to improve comfort on the trail.